Using ControlNet
Note: This article is over 3 years old. Better AI models and techniques exist – ask us in VIP support chat!
What is ControlNet in StableDiffusion?
ControlNet is a powerful set of image-to-image tools. It works similarly to Remix, but is more stencil-like, reusing the overall shape or depth or pose of the input image to create an entirely new image.
Video – Controlnet in PirateDiffusion
If you’re already familiar with ControlNet, you’re probably curious how this works over chat commands, and it’s so fast and useful once you get the hang of it. We recommend starting with this video.
- 00:00 – Intro feat. Cat Grooming Masters
- 01:00 – $200 AI prompt challenge – “The Feast”
- 05:15 – How we made the intro graphics: ControlNet
- 10:00 – Two ways to start a Control
- 14:00 – Edges mode
- 17:50 – Masks and debugging
- 18:20 – You can type /cg instead of /controlguidance
- 22:50 – New Feature – The LCM Sampler
- 27:00 – Depth mode
- 30:00 – Contours mode
- 32:00 – Showprompt recap
- 35:00 – Using /mask to create a skeleton
- 38:00 – Recap: use a debug ID as a ControlNet
- 40:00 – Poses mode
- 41:00 – To use downloaded skeletons, facelift first to create the ID
- 42:00 – Skeleton mode
- 45:00 – ControlNet quirks and tips, show wrap
The many ControlNet Modes
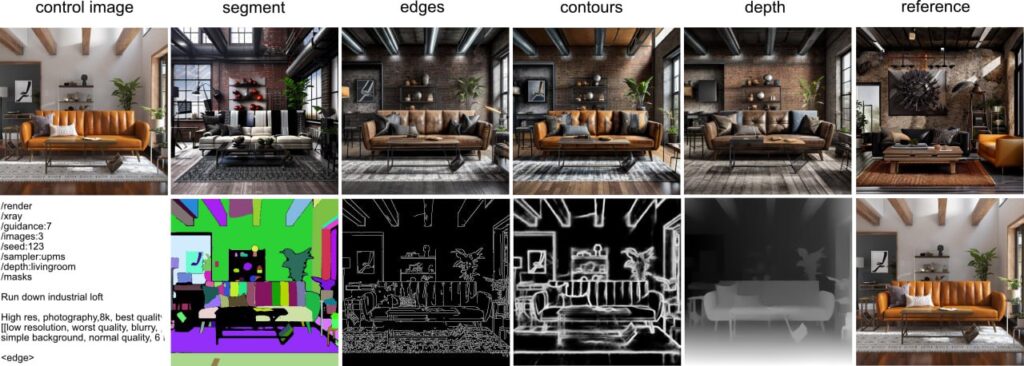
On the upper left, the “control image” is a real, original photograph. This is the input.
On the right, these are the transformations from the control image from the various ControlNet modes. The naming should be self-evident for most: Segment, Edges, Contours and Depth use the physical aspects as the basis for the new image. The general shape is transferred. In the case of Reference, you can see that the sofa was sampled and moved to a different part of the room. Not shown here is Skeleton (but is covered in the video above), you can upload a special kind of pose mask called a Skeleton, and take full control of the poses of your characters.
Try it out
As explained in the video above, you can use any rendered image or facelifted image as a ControlNet starting point, or you can store an image as preset for reuse at any time.
For beginners, we recommend the preset method. Let’s do one together.
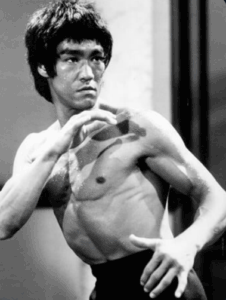
Step 1: Download this picture and paste it into Telegram
Step 2: Give it a name you’ll remember
Use the command /control /new: to save your image as a ControlNet template. In this case let’s call it bruce. So the command is:
/control /new:bruce
Just like this:
Tip: You can do this at the time of the upload, or “reply” to a photo that was already uploaded or rendered, like a result from a render command. Both ways do the same thing, they save your image as a preset. We’ll teach you how to use Controlnet without saving presets after this lesson.
Step 3: Choose a mode and try a prompt
After your template is saved, the system will remind you of all the modes that are available.
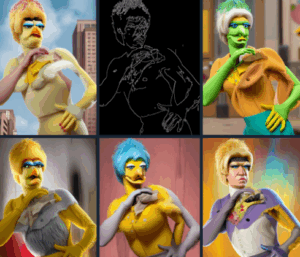
Here we can see the many modes available. Here we tried edges, and perhaps an edge detection of Bruce is too strict. If I wanted to generally copy this pose, but not necessarily so many characteristics of Bruce’s facial features, a different mode might work better.
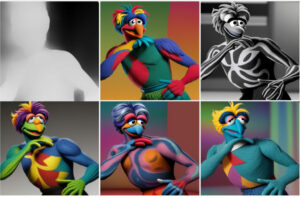
Let’s try the third mode called Depth. This will not trace the character with line lines like Edges, but give us a depth map. Copy this prompt below or write your own.
/render /depth:bruce A strange colorful cartoon Muppet <level4>
The concept Level4 is one of our models. This is how we choose what art style. This one came out a little better, as the AI was given more freedom to fill in the blanks. Compare the Edges mask and Depth mask and you’ll understand why.
Tip: End prompts with /masks to see debug information, and to download the mask for use in Inpaint
Tada! It’s that easy.
FINE TUNE WITH CONTROLGUIDANCE
You can control how much the effect is applied using a parameter for guidance by adding the /cg parameter. ControlGuidance is a value between from 0.1 (lowest) to 2 (max). Use it like this:
A strange colorful cartoon Muppet /cg:0.5
What each mode does
- Edges (Canny) — best for objects and obscured poses, where it creates a line drawing of the subject, like a coloring book, and fills that in
- Contours (HED) — an alternative, fine-focused version of edges. This one and Edges retains the most resemblance to the preset image
- Depth – as the name implies, creates a 3D depth mask to render into
- Segment – detects standalone objects in the image
- Reference – attempts to copy the abstract visual style from a reference image into the final image
- Pose — best for people whose joints are clearly defined, but you want to completely discard the original photo’s finer details. Just the pose.
One of these modes is very different from the others:
- Skeleton — Upload the ControlNet-extracted mask from a pose, and render from that skeleton’s pose. Can only be used as an input here.
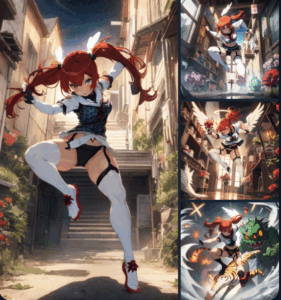
If you have time for one more lesson, try the Skeleton tutorial in the video at 42:00. You can do cool stuff like this:
2d, kicking a tiger, redhead, bangs, pigtails, absurdres, 1girl, angel girl, garter belts, training clothes, checkered legwear, white skin, cute halo, cross-shaped mark, colored skin, (monster girl:1.3), angelic, innocent, shiny, reflective, intricate details, detailed, dark flower dojo, thorns, [lowres, horns, blurry, bad anatomy, bad hands, text, error, missing fingers, extra digit, fewer digits, cropped, (low quality, worst quality:1.4), normal quality, jpeg artifacts, signature, watermark, username, blurry, monochrome, error, simple background,] <breakanime>
EXPERIMENTAL
You can also use ControlNET style Reply commands to swap faces and replace backgrounds. This is how it works:
FACE SWAP
- Upload an image or render one
- Reply to it with /control /new:BillyBob (or whatever you want to call that face)
- Upload or render the “target” image, a second picture that will receive the swap
- Reply to the target with /faceswap BillyBob
There aren’t any additional parameters to Face Swap, and it only works on very realistic faces.
BACKGROUND REPLACE
- Upload an background or render one
- Reply to the background photo with /control /new:Bedroom (or whatever room/area)
- Upload or render the target image, the second image that will receive the stored background
- Reply to the target with /bg /replace:Bedroom /blur:10
The blur parameter is between 0-255, which controls the feathering between the subject and the background. Background Replace works best when the whole subject is in view, meaning that parts of the body or object aren’t obstructed by another object. This will prevent the image from floating or creating an unrealistic background wrap.
You can also completely remove the background and save it as a mask for prompting.

